Login Meraki MR70 setup with Meraki Dashboard
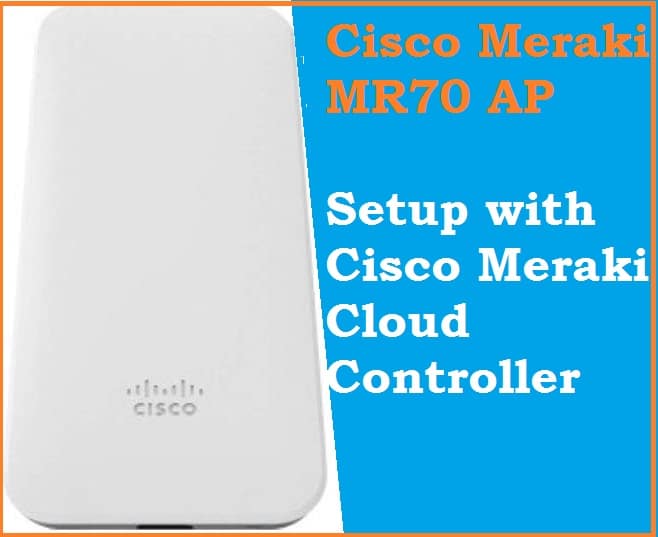
Cisco Meraki MR70 outdoor 2×2 MU-MIMO 802.11ac Wave 2 wireless Access point.MR70 is a high-end commercial access point cloud-managed and loaded with many features that ensure the security of the wireless network. If you own Meraki WiFi6 access point and looking to access and set up the first time then read the complete article to know login and setup MR70 using the cloud dashboard. This user manual provides you with simple steps to configure Meraki M70 from the cloud dashboard and adds multiple AP devices to manage from a single point. You need to connect Meraki AP to the internet to register in the cloud which helps you to manage access points from any location.
Login Meraki MR70 to Web browser
MR70 support DC power and 3af PoE from Ethernet port. Use 48Volt PoE adapter or PoE switch to power on the device.
- Connect PoE adapter PoE out to Meraki PoE port and Adapter LAN port to Internet switch or Direct PC for login.
- Go to PC LAN IP settings and use IP address 10.128.128.129 to static IP.
Meraki Default Login settings
Default Login IP address- 10.128.128.128
Meraki Default Username– Device Serial number (available on device sticker)
Default password– Blank (No password)
Login Meraki Wave 2 Router to a Web browser
Although Meraki device setup and managed with cloud dashboard you can check LAN IP address, nearby AP running, and firmware version while direct Meraki local login.
Open Web browser and access http://my.meraki.com or IP http:// 10.128.128.128. and wait for a few seconds to load the login username password pop-up window. Make sure pop-up blocker disable in your browser.
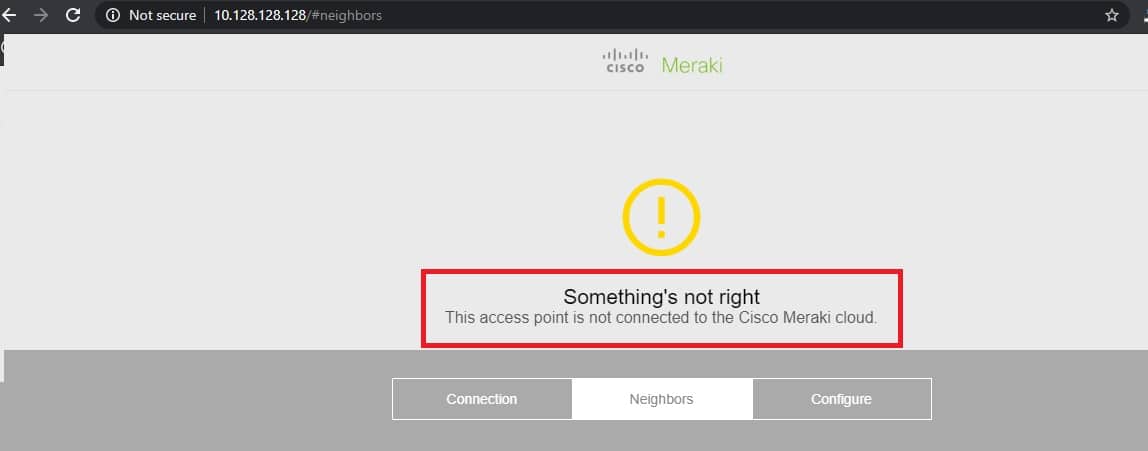
If your device does not register with the cloud you will get an error notification.
“The access point is not connected to the Cisco Meraki cloud”
If you getting the same error you may follow steps to login cloud and register products first so you can configure and manage.
Setup Meraki Wave2 AP with Cloud
You have to create a cisco Meraki cloud account to manage your device using the cloud.
Meraki cloud account free available for setup and manage Cisco Meraki Devices.
Go to – https://account.meraki.com/secure/login/dashboard_login and create a new cloud account.
Provide Email Address, Name, and password details to create a new cloud account.
After signup cloud account login and follow further setups to claim Access point to configure through the cloud.
Login cloud and Create New Network
Login cloud account with username and password you created.
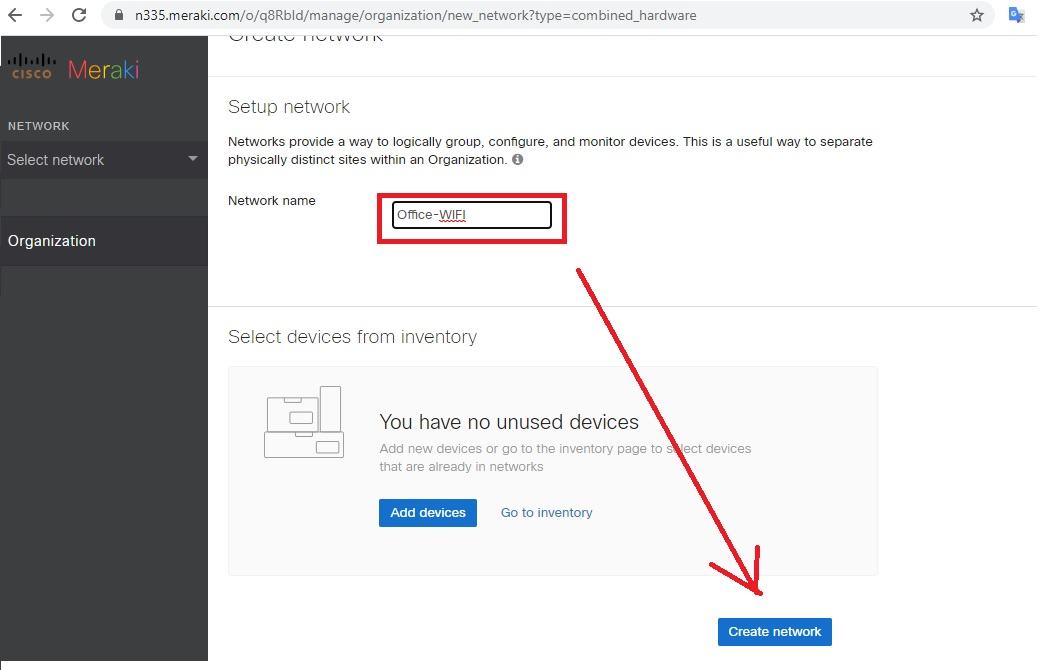
You will get the first window setup network.
Network Name- Office-WiFi
Press Create a network button to proceed to add devices.
Configure Templates
Configure templates will apply settings to add devices added to bind network.you can configure different templates as per location you want to manage.
EXP- template for home wifi and template for office WiFi.
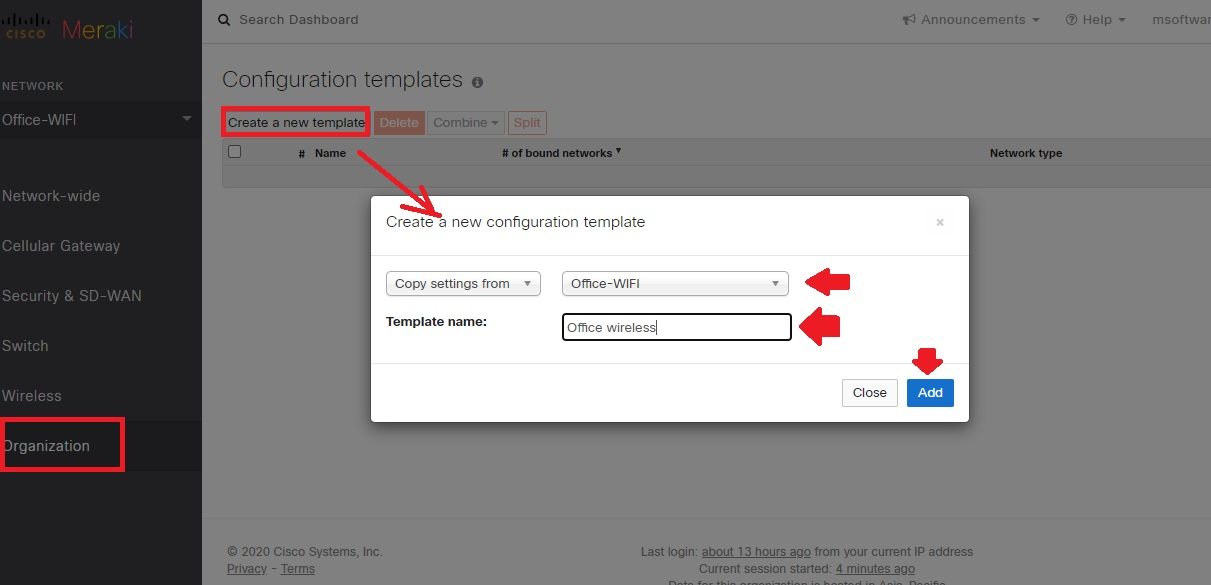
Go to Organization- Configure templates
Create New Template– Choose Network you want to apply this template with.
Provide a name for Template so you can manage easily.
Press the Add button and provide further details in the next steps.
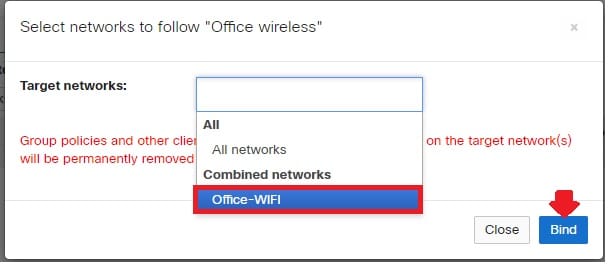
Target Networks: choose the network from the list you want to follow these templates for the network.
Press “bind” button to bind the network with a template and save settings to apply settings.
After creating Network now you can add new access points to the network you added.
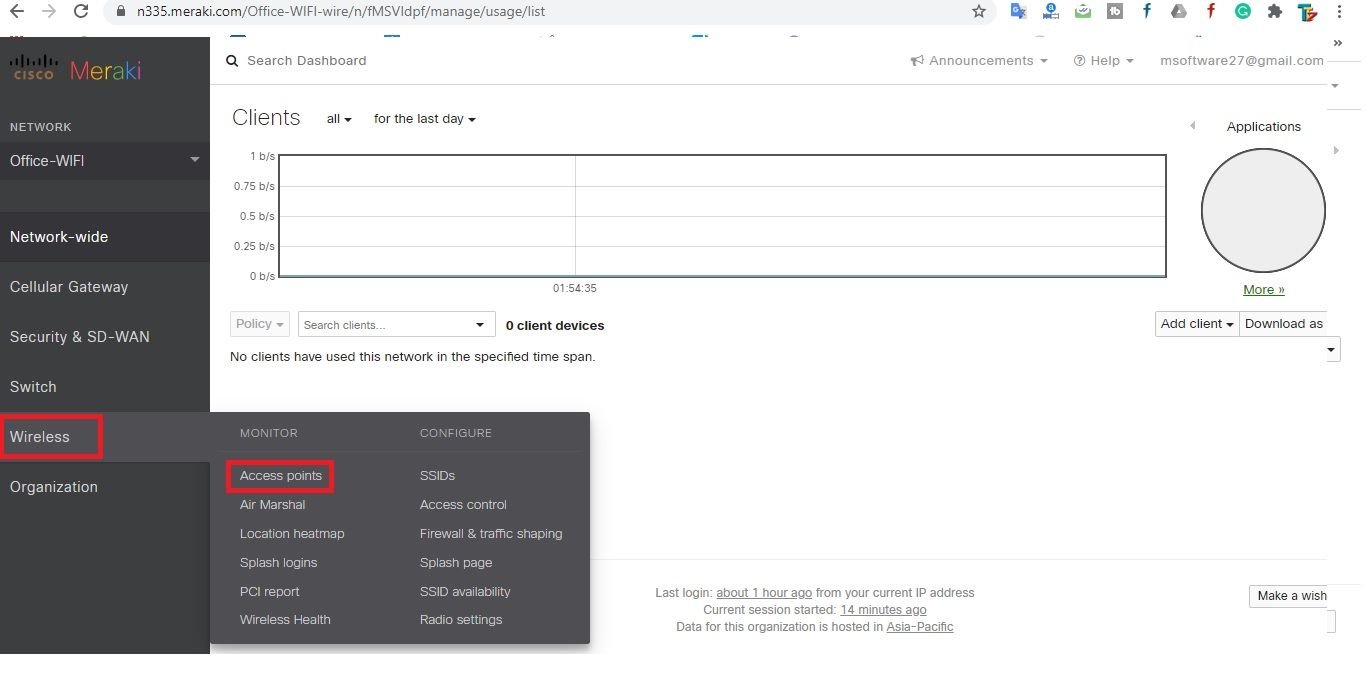
Go to Wireless- Access point to add new access points.
Press the Add device button to register new Meraki devices to the cloud.
Select the Register Meraki device option and press the Next button.
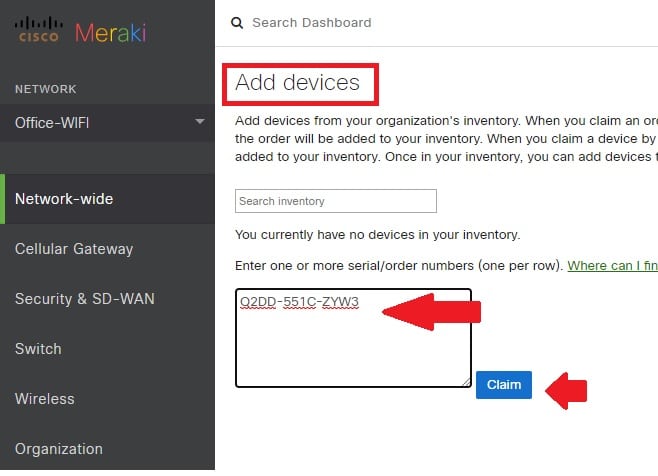
You will get the Add devices option as shown below image.
Enter on or more serial /order number-
Provide you Cisco Meraki AP serial details available at sticker.
You can add multiple device serial number each per row.
Once serial number typed inbox then press the claim button to start the registration process.
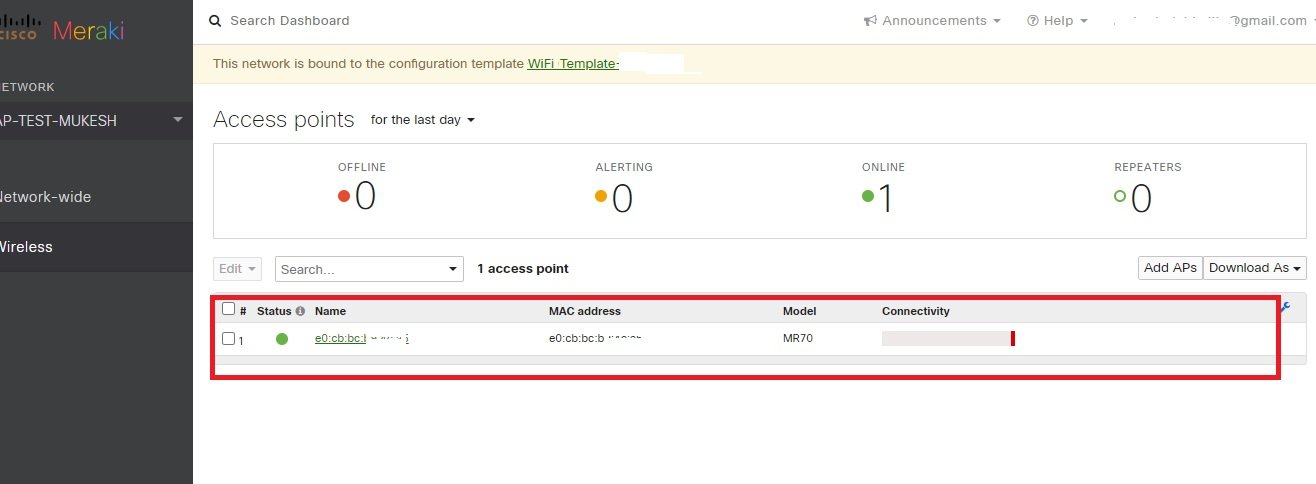
All devices will be added to the list under network you create and after a few seconds, you can see the WiFi SSID name configured to all devices.
Setup WiFi SSID and Password
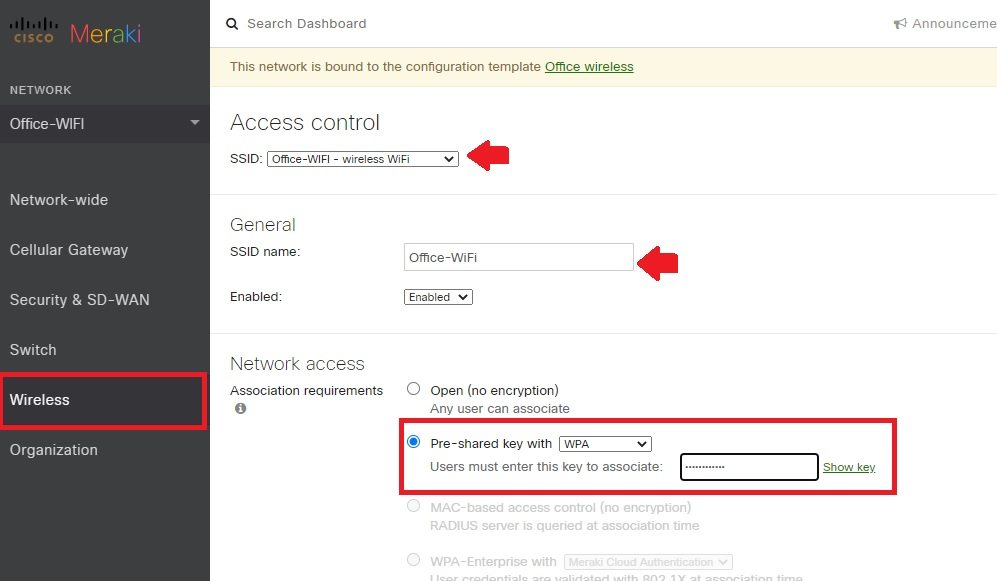
To create a WiFi password in the cloud dashboard follow steps.
Go to Wireless- Access Control
Access Control– Choose SSID name
SSID- Office Wi-Fi (if you want to use different SSID name you can change here)
Network Access– Pre-Shared Key (PSK)- create wifi password
You can choose other wifi security method types such as Mac-based access control, Enterprises with cloud authentication, and identity PSK with radius.
Save settings and check WiFi password should be configured and device connect to Meraki SSID without the password will auto disconnect.
Meraki Troubleshooting
If you facing any error while registering AP to cloud controller then follow troubleshooting steps to fix the error.
Error while login AP web interface without a cloud
If you getting an error “you connected to my.meraki.com, but you are likely not currently connected to a Cisco Meraki access point” follow steps to fix this issue.
- Make sure you Meraki device plugged into PC LAN port properly.
- PC static IP address should be in the range 10.128.128.130 or 131
How to Fix WiFi Signal issue using Old WiFi Router
Issue while registering to Meraki cloud controller
unable to register devices to cloud control
Make sure Meraki device connected to the internet and device LAN IP address in DHCP mode so AP can get internet IP address and gateway automatic from the DHCP server.
The device already register with another account
If you facing issues while adding Meraki AP to cloud control that can be device already register with other accounts then make sure someone already not claim the same device to any other accounts. Remove the device from other account and try to register again.
If still facing any error you may make a factory reset device to restore into factory mode.
How to Factory Reset Meraki MR70 Dual-band AP
- Locate a small reset button with a hole beside to Ethernet port.
- Use a small needle to press the reset button.
- Press and hold the reset button for 10-15 seconds and release it when led blinking.
- This process may take 3-5 minutes to finish resetting so wait until device reboots.
Understand LED light blinking in different colors
Each color blinking specified different system functionality and performance.
- Orange – AP is booting (permanent Orange suggests hardware issue)
- Rainbow – AP is initializing/scanning
- Blinking Blue – AP is upgrading
- Green – AP in Gateway mode with no clients
- Blue – AP in Gateway mode with clients
- Blinking Orange – AP can’t find uplink
Related Post
- login 192.168.10.1 IP Address with admin password
- Login Huawei Router- 192.168.1.1/192.168.3.1
- How to turn wired IP Camera into Wireless camera
- Login Fiber ONT/ONU Device with Admin user
