Simple steps to make wired CCTV camera to wifi camera for long-range installation. read the article to know How to turn wired IP Camera into a Wireless camera.
How to turn wired IP Camera into Wireless camera using Old WIFi Router
The most difficult job Is laying a physical cable outdoors for CCTV cameras. Using technology difficult jobs can be simple and easy within a few steps. Using an old wifi router use the wired camera as a wireless camera and no need to lay a cable from NVR to CCTV. If you have any brand router or WiFi repeater such as TPLink wifi repeater, D-Link Wireless range extender device you can use it to connect the Camera to make it wireless. In this post, you will get a simple guide to use the old router as a client device to connect IP cameras without laying a cable from NVR.
To turn wired IP camera into a wifi camera you need a wireless router with multiple wireless operation mode support.
To set up the wifi router as a repeater to connect the IP camera need to understand the network diagrams. You can use any brand WiFi router and an AP device to connect the camera.
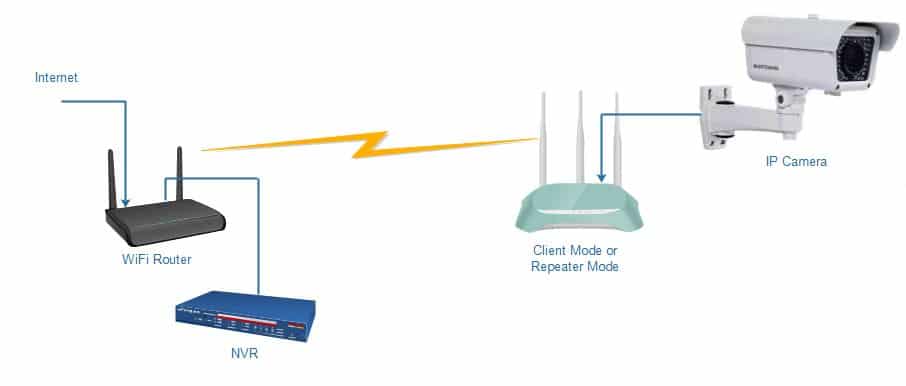
In this diagram, the Main WiFi router connected to internet cable comes from Internet providers.
NVR is connected to Main WiFi Router.
The second wifi router is configured in Client or Repeater mode which is connected to Main WiFi Router wirelessly. IP camera connected to Repeater router through LAN cable into Lan ports.
This setup needs to turn a wired CCTV camera into a wireless camera without laying cable from the NVR to the Camera.
The first router will configure as Access Point mode or AP router mode.
Setup the second Router as Client mode
You can use any old wifi router at 150Mbps or 300Mbps to connect IP cameras.
The second wifi router will be configured as client mode or Wifi range extender mode to use wired ip camera work as wireless. does not matter if you are using the HIkvision CCTV camera, Dahua CCTV camera or CP Plus IP camera. You can use this method with any brand IP camera.
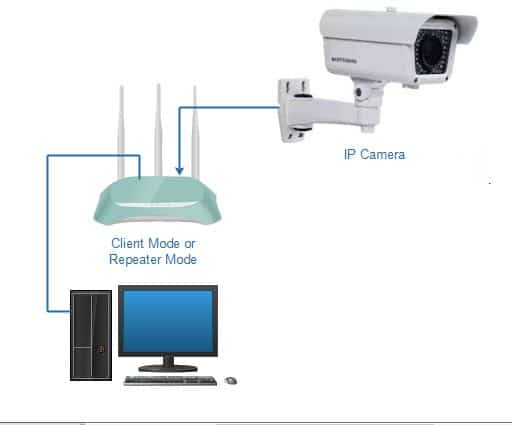
Connect the WiFi router LAN port to the Desktop or PC LAN port to the configuration as client or repeater mode. Connect the IP camera to the second LAN port or you can connect after the configuration is done.
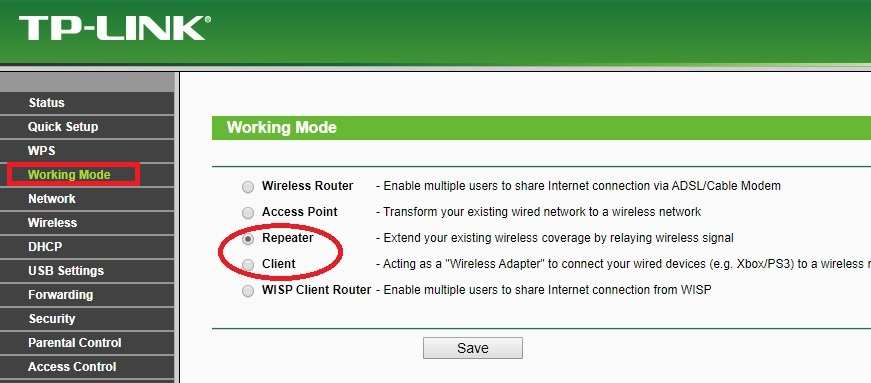
1: Login WiFi router using default IP Address or make a factory reset if forget IP address or login details.
- 2: Go to operation mode and choose Repeater mode or Client mode. If repeater mode not available you can use Client mode.
3: Go to wireless and scan or Site survey for existing WiFi router name.
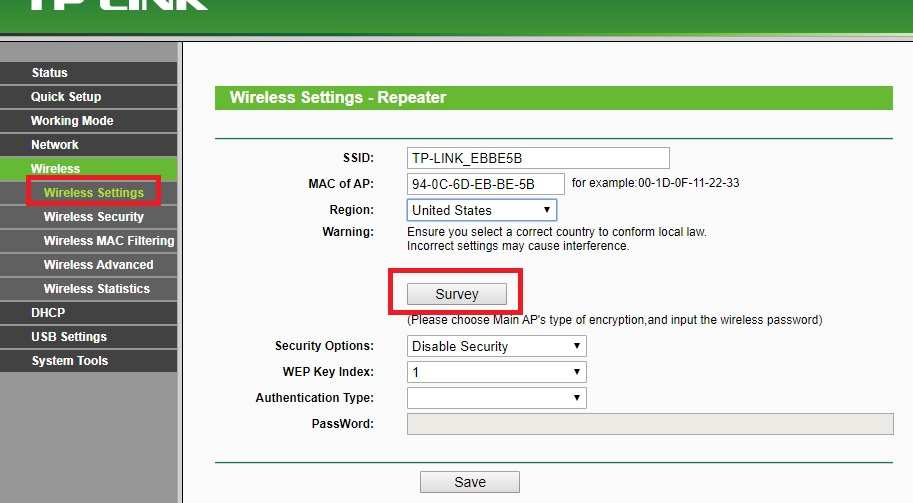
4: All WiFi name lists will load after scanning. Find your wifi router name from the list and click the connect button to join.

5: Provide the Main Wifi router password to allow connection from the repeater/client device.
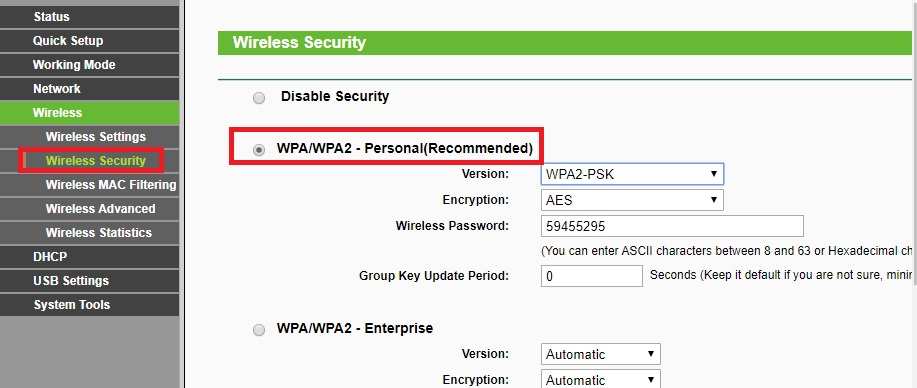
6: click the save or next button.
7: Change the default IP Address of the client device to avoid any network conflict.
Go to Network- LAN and change the IP address to the same series as a WiFi router.
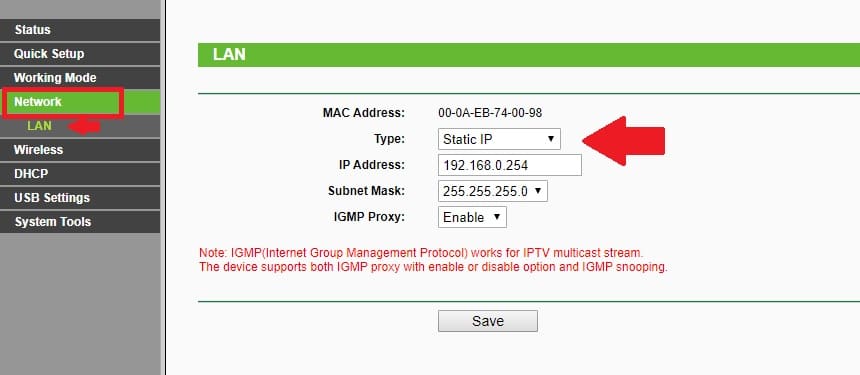
Save the settings router will reboot and connect to the host Wi-Fi router.
Once the repeater is connected successfully now connect the IP camera to the Repeater /Client LAN port.
The main WiFi router will be connected to NVR and the IP camera start showing live in NVR using the wireless connection and without laying a physical cable.
This is a simple and cost-effective method to turn wired IP cameras into wireless ones without buying any range extender device.
Using this method outdoor Access point to the client device can be used to install an IP camera outdoors without laying a physical network cable. Using a wireless device saves the time and labor cost that needs to lay for physical cable installation.
Related Post
- List of Best Gaming Modem with Gigabit Speed
- Netgear AC1200 WiFi Range Extender Setup
- Tenda N300 Repeater Mode Configuration [N301]
- iBall Baton 300M Repeater Mode configuration