How to Login Wavlink AC1200 Dual Band Router?
In an earlier article, we have post Setup Wavink range extender mode to extend wifi network in the dark area. Wavlink provides the best dual-band wifi router for online streaming and gaming purpose with gigabit speed. If you own wavlink AC1200 wifi router or any other model looking to ap set up the first time then you are getting each and every information in this article. You need to log in wavlink router to set up the first time as per internet connection and change the default wifi name and password to secure the network.
Wavlink Ac1200 wifi router login required a connection with the router either wired or wifi to access the web interface from the browser. Wavlink WN531G3 has 3LAN and 1 WAN port for wired connection and 4 Omnidirectional external antennas for wifi signal range. 1 Gigabit LAN provides 1000Mbps wired connectivity and 2 Fast Ethernet for up to 100Mbps wired connectivity. You can also get security features, like content filtering, firewall, and port forwarding with Wavlink wifi router firmware.
Step to Login into Wavlnk Router Settings
You can login wavlink wifi router either using a mobile or desktop PC but required a connection with the device.
- Connect internet cable to router WAN port.
- Use LAN cable to connect from LAN port to Computer LAN port for a wired connection or wirelessly by using the SSID (network name) and password printed on the bottom label of the router.
- Turn On a router with a DC adapter that comes with the box.
- Go to computer Network LAN IP settings and use DHCP mode or use manual IP Address 192.168.10.2 using the static IP address option.
Wavlink Router Default Login Settings
You can also find Router Login IP address username and password printed to the router sticker.
Default Wavlink Login IP address – 192.168.10.1
or
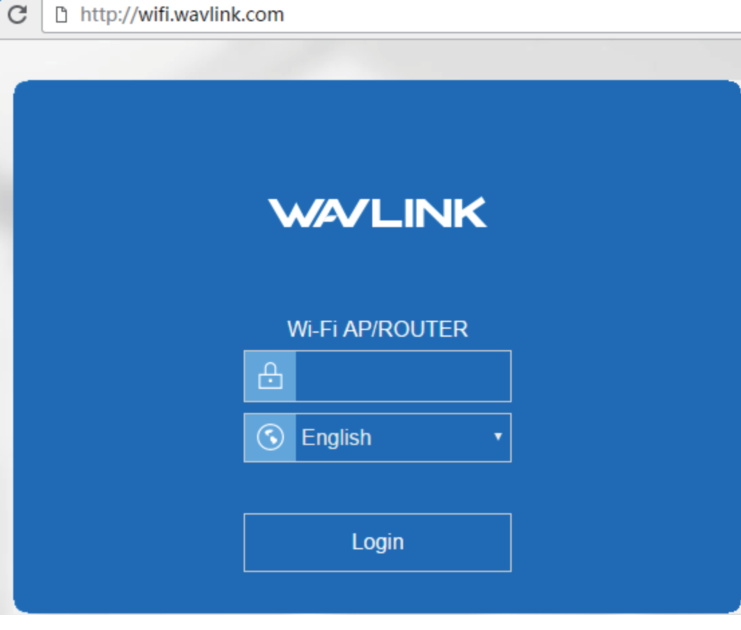
URL- http://wifi.wavlink.com
Wavlink Login username – admin or NA
Wavlink ac1200 login Password – admin
192.168.0.1 Default admin username and password
Login Wavlink Web interface
Open web browsers such as Google Chrome, Mozilla Firefox, or Microsoft Edge and visit wifi.wavlink.com login or http://192.168.10.l and press enter key.
After a few seconds, the login page will load asking for username and password. Use default login details and select your country language to enter into router settings.
Once you logged into wave link router settings you will land in the dashboard where you can get all Operation mode settings, Wireless settings, System settings, and other configurations.
Change WiFi SSID and Password
Default Wavlink WiFi SSID network name printed to label available on the router so it’s highly recommended to change WiFi SSID while setup the first time. If your routerWavlink N300 single band then creating SSID for 2.4G if its 802.11ac dual-band then create SSID for both band 5G as well as 4G.
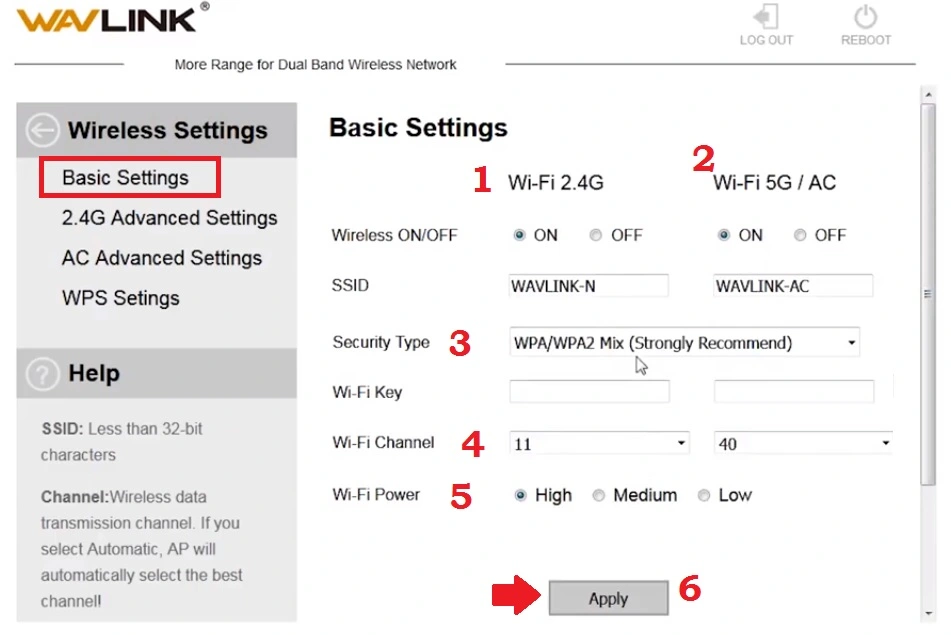
Go Wireless basic settings from Dashboard to setup Wireless settings.
Wireless settings- Basic Settings
1: Wi-Fi 2.4G- Wireless: ON
2: Wi-Fi 5G/ AC : ON
SSID – WAVLINK-N (change this for 2.4G) and WAVLink-AC change this for 5.8G WIFI.
3: Security Type– WPA/WPA2 Mix (Strongly Recommend)
Wi-Fi Key– set a password for 2.4G and 5.8G wifi networks.
4- WiFi Channel– 11 for 2.4G and 40 for 5G ( channel number can change depending on area interference.
5: Wi-Fi Power– High ( power is transmitting power for wifi signal range control)
6: Apply- After all configurations press the Apply button to save changes.
Change also login password for Wavlink AC200 router to secure router web interface access user connected to wifi.
Wavlink Login Password Change
Updating a password is an important step during weblink setup for the internet.
Management- Password from the dashboard.
Old password– admin
New password– create wavlink login password
Confirm new password– confirm a new password again.
Press Apply button and log in again with a new login password.
Wavlink Router Troubleshooting
You may not technical person and facing a login issue with the Wavlink router while accessing from a web browser due to some network glitch then read the troubleshooting part to fix the login issue.
Wavlink login IP address not working
192.168.10.1 not working or Unable to login 192.168.l0.1 login IP address or taking a too long time to respond or can’t access.
Follow the step to fix the login IP address not accessing.
- Make sure you are using the default login IP address printed to the router label.
- Use the http://192.168.10.1 instead of typing 192.168.l.10 IP addresses for the access web interface.
- Your computer LAN IP settings should be in DHCP mode or Wavlink default IP series.
- Make sure your router LAN IP address has already been not changed.
If you still can’t login to the Wavlink Wireless router then restore settings to factory default.
How to Factory Default Wavlink WiFi Router?
Making factory reset router settings will erase all the configurations configured in WAN, LAN, and WIFI settings so make sure you have all settings detail to setup the router again. Follow Wavlink ac1200 instructions to restore settings.
Steps to Factory Reset WAV Link Wi-Fi Router
- Locate a small reset button available on Wavlink Ac600, Ac1200, or any other router.
- Try a 30/30/30 reset method to factory default settings.
- Press and hold the reset button for 30 seconds and release when the led light blinks and rebooting start.
- This process will take 3-5 minutes to finish the reset process. Wait until the router reboots.
- Login again with the default IP address and password printed to the router user manual and label.
Related Post
- How to Fix WiFi Signal issue using Old WiFi Router
- 192.168.0.1 Default admin username and password
- WiFi Repeater Vs Range Extender?
- Best VPN Routers Hardware for Home


